How to change the Windows 10 network location to private, when connected through a network cable
If you are on a desktop PC with Windows 10 that is connected to the network using an Ethernet cable, the procedure is different. First, click the network icon in the notification area of the taskbar (usually found on the bottom-right corner of the screen). Then, click on the name of the network that you are connected to.
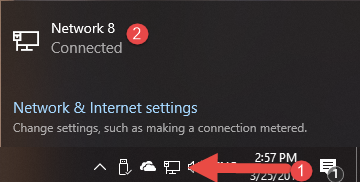
The Settings window is shown,
with the settings for your Ethernet network connection. Click again on the name
of the network.
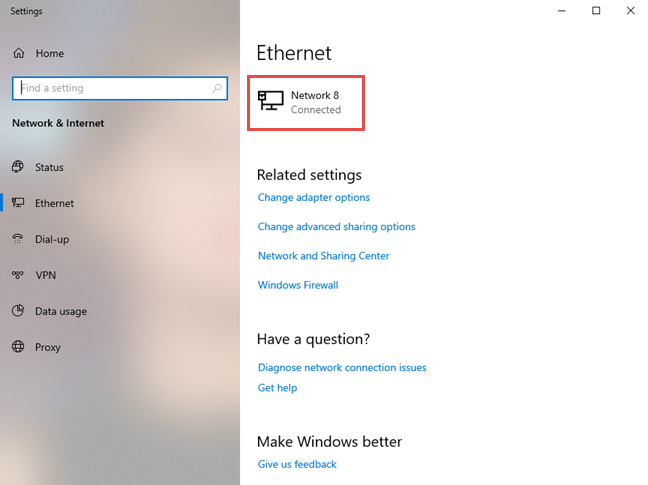
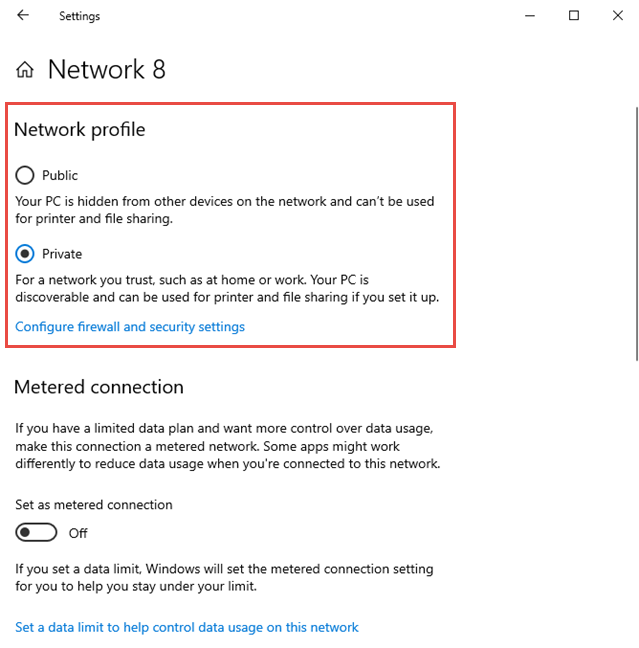
A list of settings is shown, for your active
network connection. In the "Network profile" section,
click or tap Private, and the network location is changed.
Alternatively, if you want to change the network location from Private to Public,
make the opposite choice.
Close the Settings window and you are done. The change is immediately applied and used by Windows 10.